Skyler E.
I’ve had a tumultuous relationship with my skin since I was fifteen years old. Acne and I are old friends, and a few years ago I started to have other skin related issues like cystic acne, eczema and allergy related hives and rashes. It pretty much sucks. I can’t think of any other way to describe it. It’s made me feel so vulnerable and angry at times.
I’d ask myself, “Why can’t I have good skin? What’s wrong with me? I take care of myself, I see a dermatologist, I’ve tried so many things…. why isn’t my skin normal?” And honestly, I still ask myself these questions. I’ve come to know that I may always have to deal with these problems. Even my 85 year old grandfather still has acne. So if this is my situation, I need to make do.
Everyone’s skin and chemical makeup is different. So sharing treatment ideas isn’t always helpful to me because there is never any guarantee that it will work for you. I personally have been unable to find the right treatment to successfully fight my acne, so I decided to hone my acne hiding skills. When I wear makeup, it makes me feel confident and so much better about myself. I feel like I can tackle my day and that’s what works for me. Maybe you feel the same way, but you haven’t been able to pin the right method down yet. That’s why I wanted to write this, for anyone who has had these problems too.
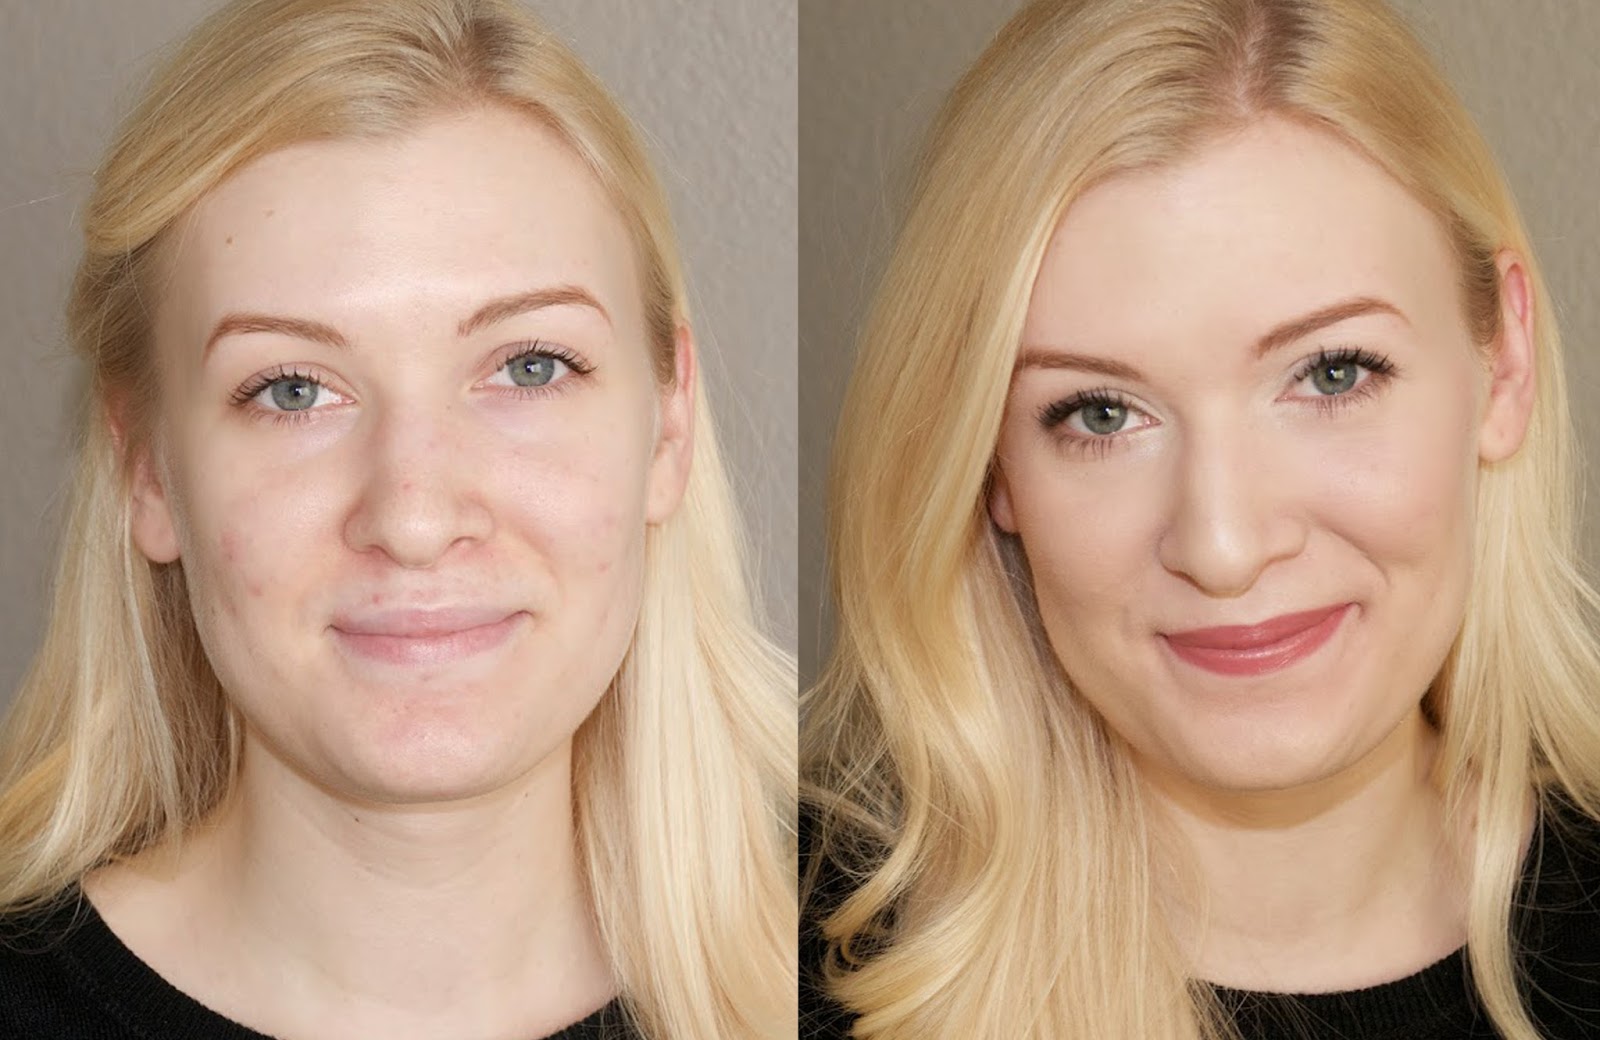
To be honest, most people I know aren't aware that I even have acne or any skin problems. So since that’s the case, I want to share with you how I cover my acne.
Step 1: First I start out with a clean face, and because I’m prone to oily skin I apply a very light moisturizer beforehand. If your skin is very dry, it will try and compensate by producing more oils than normal, which will lead to greasy skin. I really don’t want that. Also, if you are dealing with any dried scabs from healing acne (I’m a picker), moisturizing them will keep you from having visibly dry flaky spots.
Step 2: Apply a primer. Why? Primers help your foundation stay put longer, which is something you really want if you struggle with acne. They also help even out your skin texture (filling in large pores) and create a barrier between your skin and your makeup.
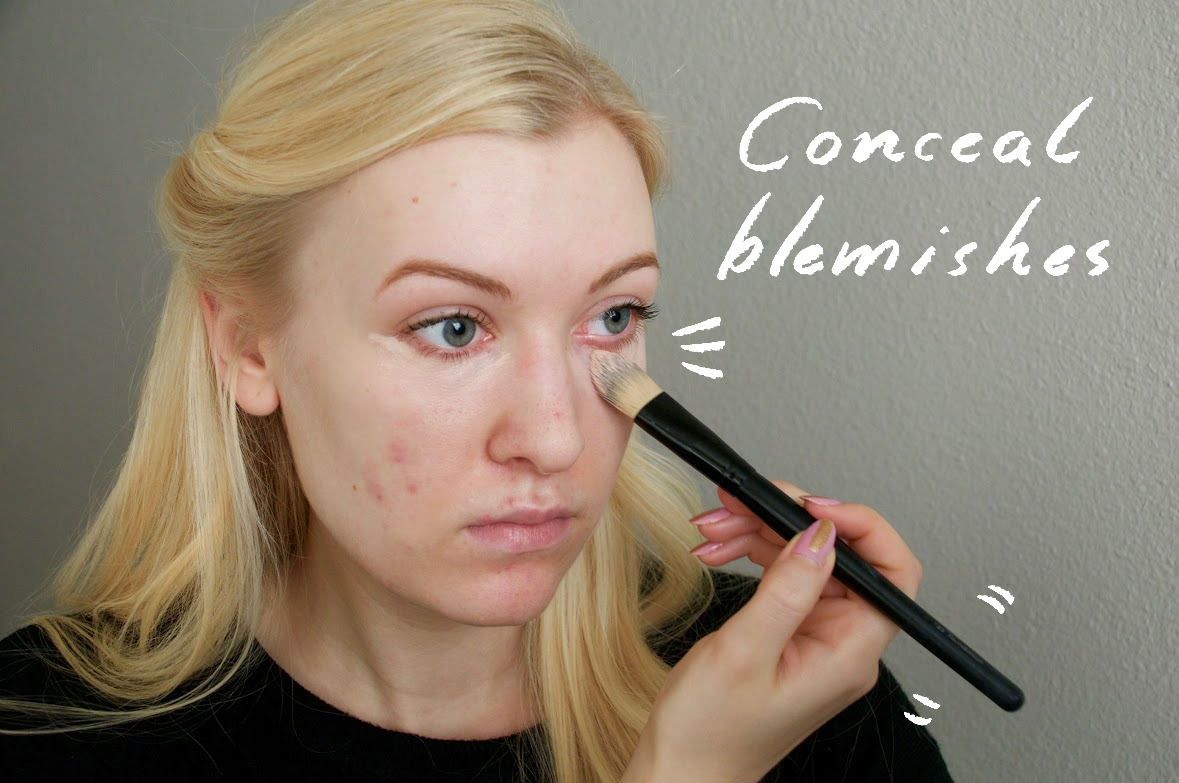
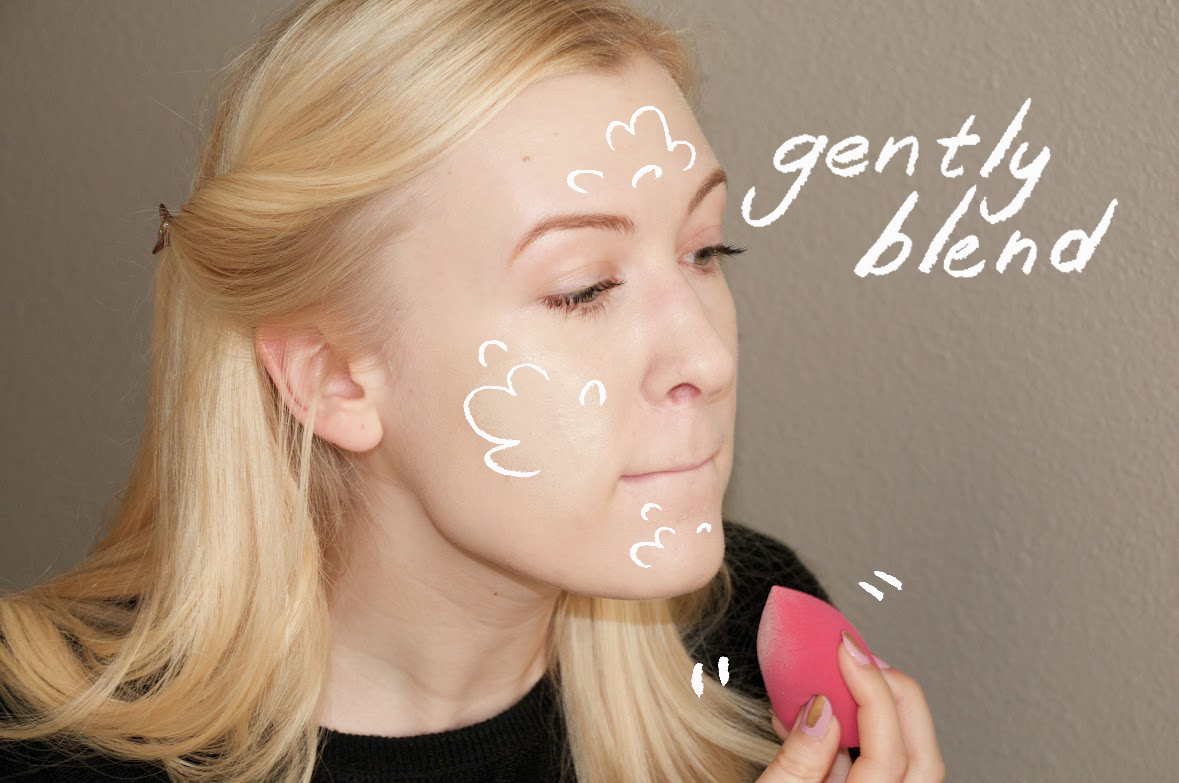
Step 3: Apply a concealer to your major spots, discoloration or dark undereye circles. I have all of these! I chose a concealer that is slightly lighter than my skin tone because I want those areas to reflect light, and appear fresh and bright. I swipe the concealer over with a brush and then blend in, very gently, with my finger.
Step 4. Foundation!
Before I go into this, I’ll tell you right now that finding the right foundation for me had always been a nightmare. I could never find a liquid foundation that could conceal my skin problems, match my VERY pale skin tone, and not bother my sensitivity or make my acne worse. I’ve had makeup that gave me hives, foundation that would melt clean off my face in the heat, or turn orange when my skin got oily (that was so embarrassing), or look like I used baking powder instead of actual makeup. Why is this so hard!?!
Then my mom introduced me to custom blend foundation. I was able to get a foundation that was a perfect match to my skintone, and took into account my various skin problems and ailments. You can chose how much coverage you want, the finish you prefer, you can even have skin treatments added to it and it’s made from 100% minerals. This can be done in liquid and powder. I use the Motives Cosmetics brand and its freaking amazing.
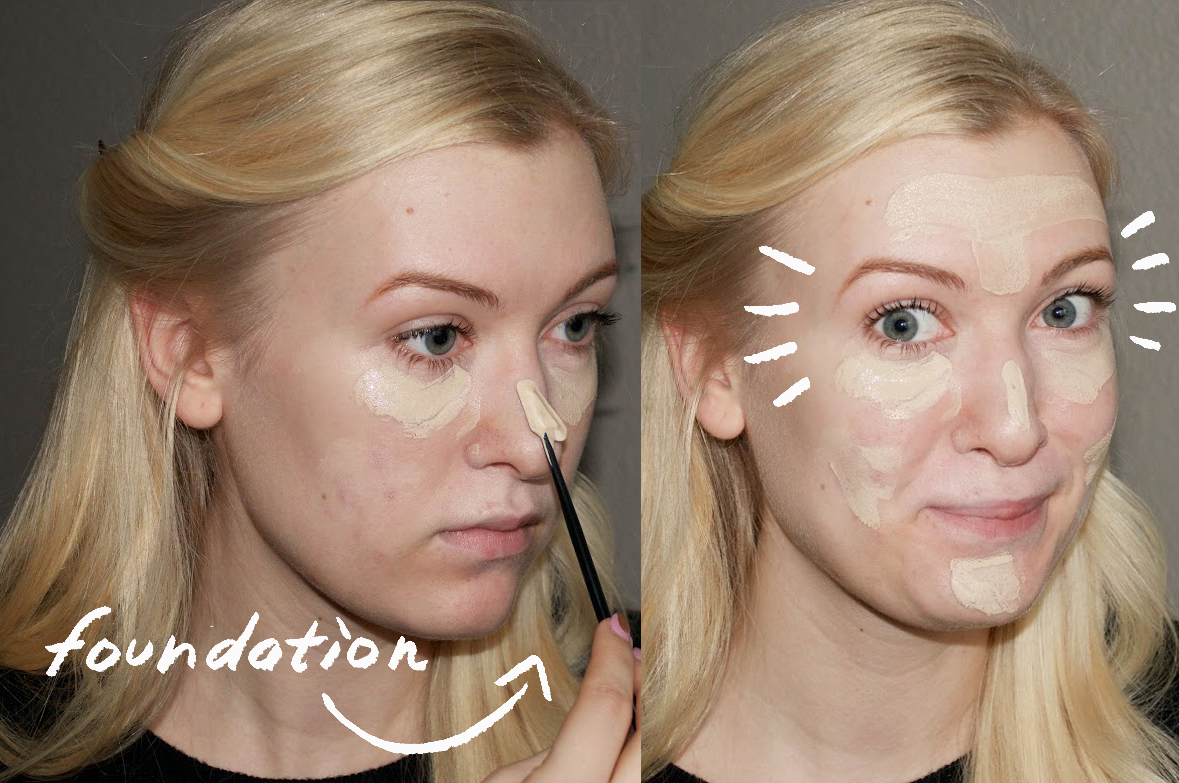
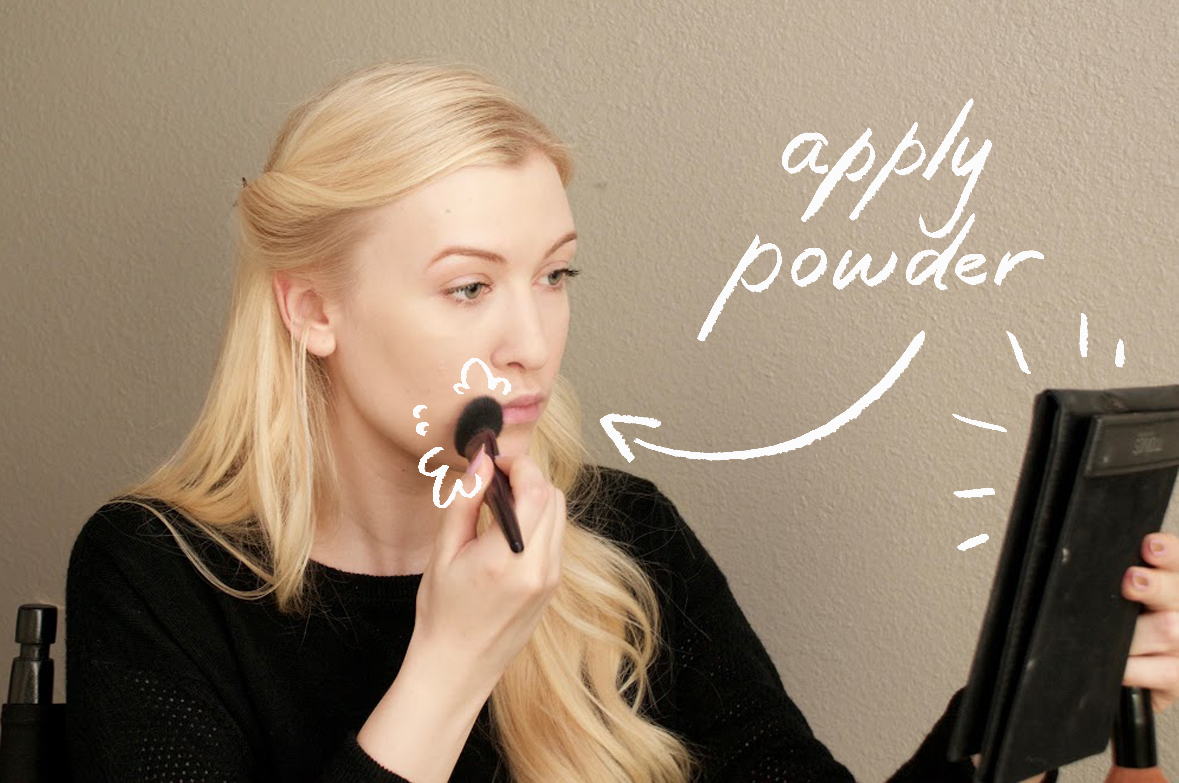
I apply the foundation, building my coverage as I go, I gently stipple it over my face with a blending sponge. This sponge is the best! I prefer it a million times more to a foundation brush. You just fully saturate it with water and then wring it out. It works best in combination with a water based foundation. You can also use this for contouring.
In between each layer, I let it dry. Think of when you’re painting. If you try to add more paint to a piece of wood while the first layer is still half dry, you start to see buildup and the layer underneath begins to shift around and get… weird. The paint becomes uneven and messy. It’s the same principle with this. So be patient.
Once you are happy with your coverage, let it dry fully for a few minutes.

The goal here is to do your makeup once and then not have to worry about it for the rest of the day. In my mind, it’s better to take a little bit longer to get ready if that means you can look and feel your best throughout the day.
At this point you can apply your blush.
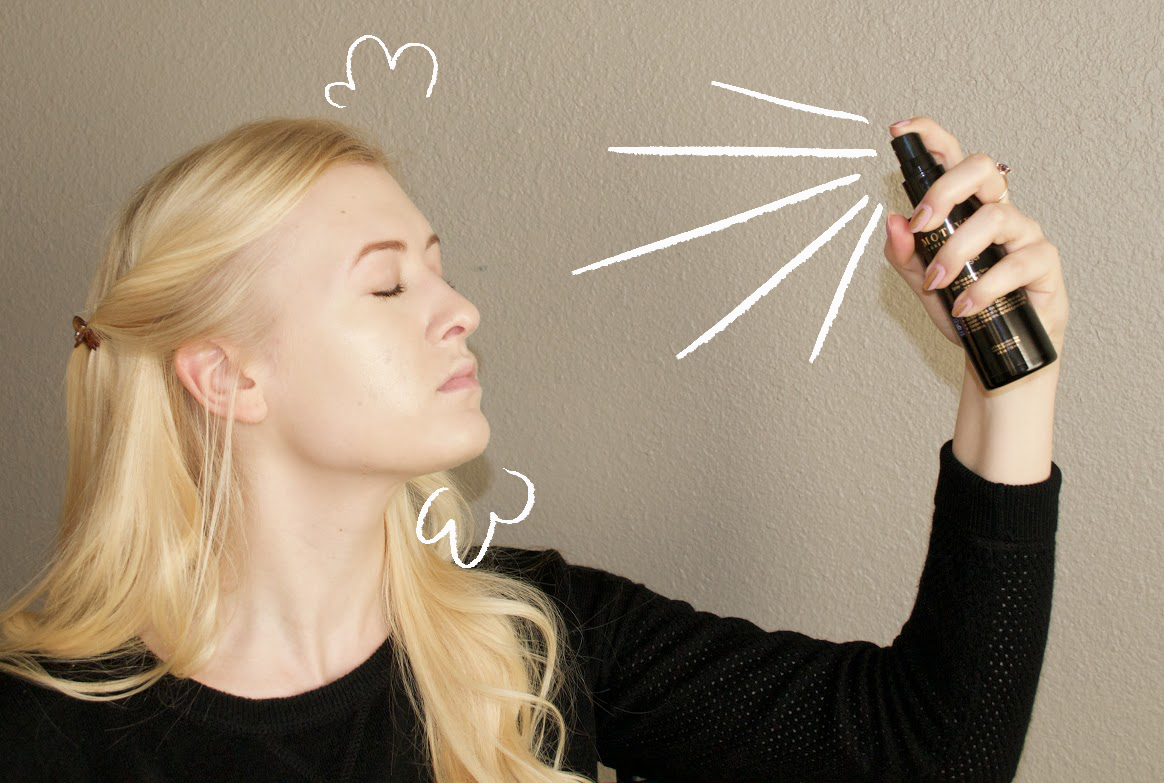
Step 7: Set your makeup one last time with another light mist of setting spray and you’re done!

Now that I'm looking and feeling good, let's go kick this day in the butt!
-skyler


Great post! Very helpful, and you look gorgeous! :-)
ReplyDeleteApril xx
| APRIL ROSE PENGILLY |
Haha, that's very encouraging! This post was hard for me to do because it's full of pictures of me barefaced and zitty. But if it actually helps someone, than its totally worth it!
DeleteI get occasional cystic acne breakouts and this is the first thing I reach for when I feel them come on. Using Acne Dermalmd Treatment makes them pass much quicker. I always make sure to apply to dry skin 20 minutes after cleansing and following with moisturizer to avoid any irritation.
ReplyDelete